


Sophie Pacek
Exercise Physiologist, Healthy Connections
For those of you who read last week’s blog, you’d know it was all to do with the shoulder and its primary stabilising muscles, the rotator cuff group. These four muscles are responsible for keeping the ‘ball’ (humeral head) in its ‘socket’ (glenoid fossa of shoulder blade) whilst allowing the arm to move in multiple directions.
Rehabilitation from several shoulder injuries involves improving mobility and strength of the rotator cuff group. Below is a list of exercises that promote a balance between shoulder stability and mobility. The exercises are classified into two sections: range of movement (exercises aiming to improve mobility) and strength (those aiming to improve stability). It is important to begin with the range of movement exercises because we need to improve mobility before adding a resistance to improve strength.
If you have a shoulder injury or restricted mobility, it is important to perform these exercises within your pain limits. In other words, only go to the point before onset of pain rather than pushing through – these exercises are not designed to hurt you but should be challenging on the muscles surrounding your shoulders. Another way of thinking about it is using a 0-10 pain scale, where 0 is no pain, 5 is considerable pain and 10 is extreme pain – if your pain rating is above 3, stop the activity or reduce the range of movement. As always, if you are unsure or have any questions, please do not hesitate to ask an exercise physiologist at Healthy Connections for individualised advice.
Let’s get into some exercise!
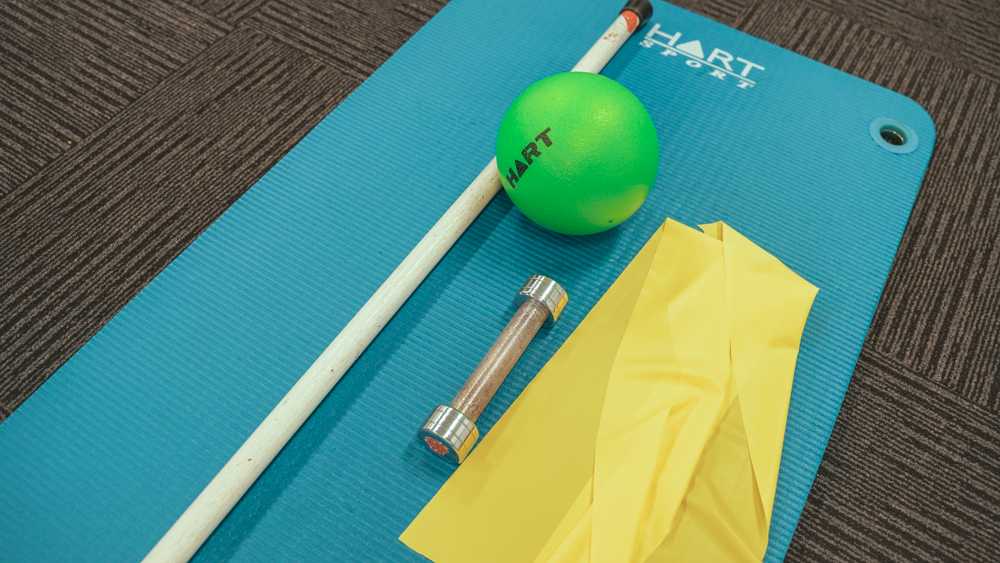
Equipment
- Exercise/yoga mat
- Theraband
- Broomstick or pole
- Foam ball, cushion or towel
- Weight
Range of movement exercises
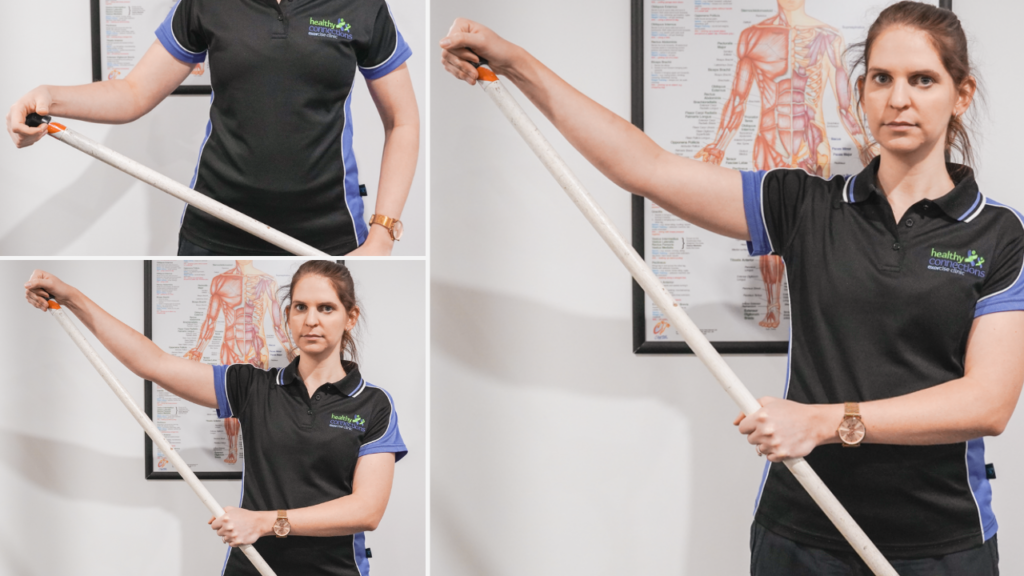
1. Broomstick mobility
Using a broomstick or pole in one hand, place your other hand on the top of the stick. The arm holding the stick is the active arm, whilst the other arm resting on the top of the stick is the passive arm. The passive arm should be entirely relaxed, like dead weight. Using your active arm, lift the broomstick out in front or out to the side (within your pain limits). Remember to keep your passive arm totally relaxed. Repeat on the other side.
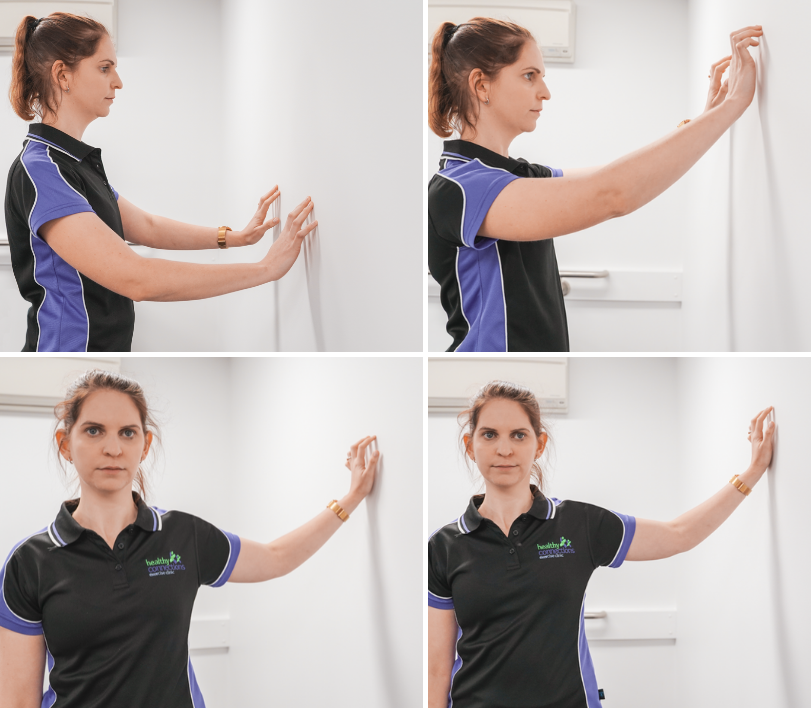
2. Wall spiders
Stand either facing a wall or side on to a wall at arm’s length distance away. With your hand/s placed on the wall, slowly walk up the wall like your hand is a spider, to the point that you can no longer reach (or within your pain limits). Slowly walk hand/s back down and repeat. Perform this exercise facing forward at the wall and side on to the wall.
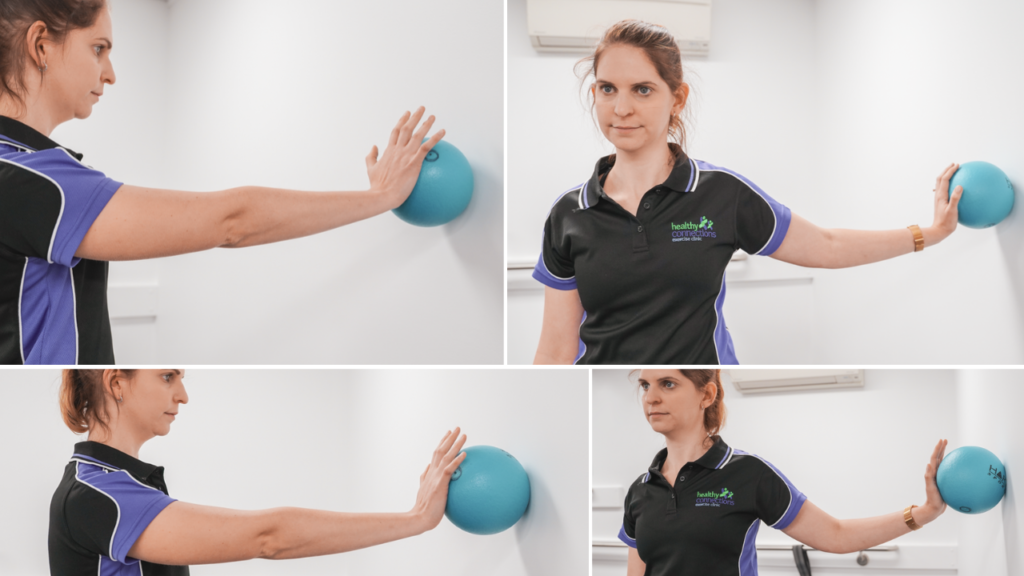
3. Wiping the wall (arm circles)
Stand either facing a wall or side on to a wall at arm’s length distance away. Have a foam ball, cushion or rolled-up towel between your hand and the wall. Keeping your arm straight (and elbow still), draw little circles with your active arm, as if you are wiping the shower wall. Repeat in the other direction then swap to the other side.
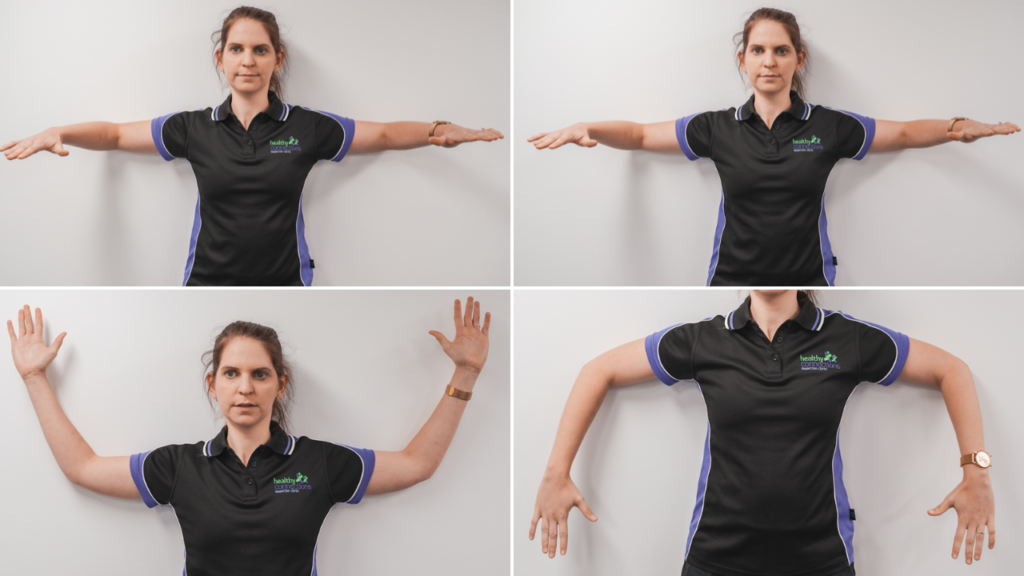
4. Internal and external rotation at wall
Stand with your back against the wall, arms at shoulder height. Keeping your elbows fixed at a 90 degree angle, rise your forearms up to within your pain limits like ‘stop signs’. Slowly lower to start position then continue to lower them down as if you are trying to touch your palms to the wall. Remember to only move within your pain or mobility limits.
Strength exercises
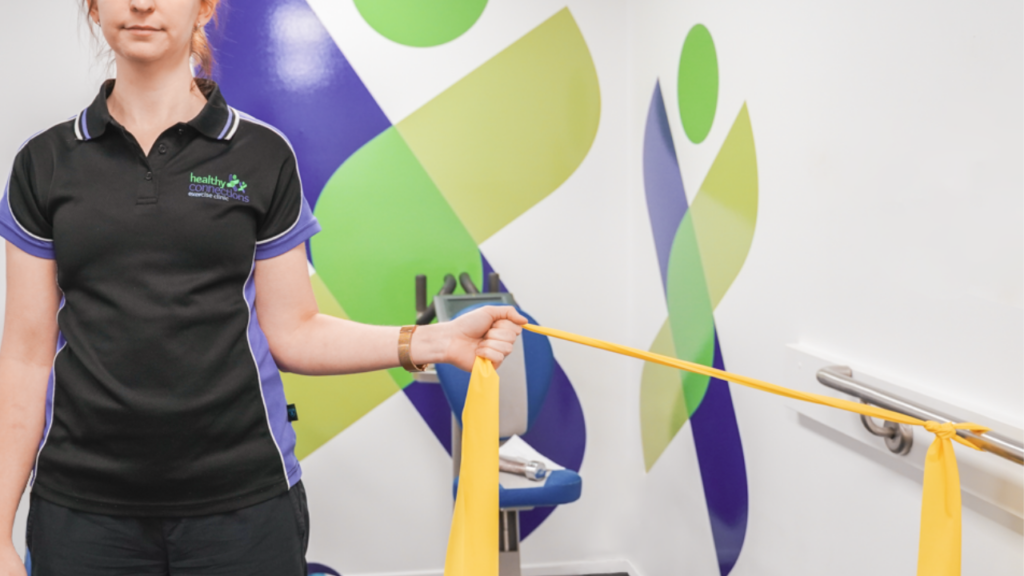
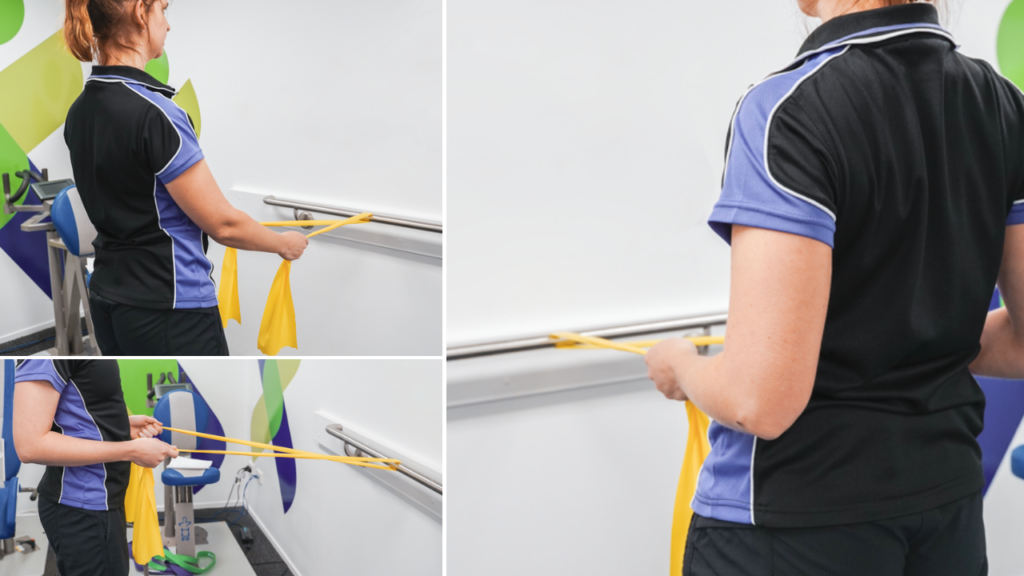
1. Internal rotation
a. Beginner: theraband or weight at 0 degrees abduction
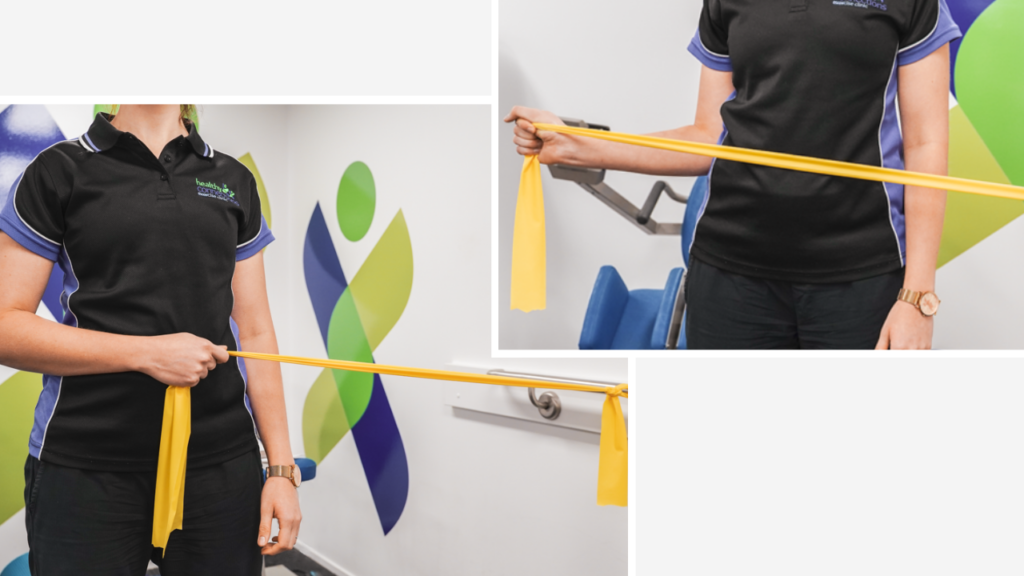
Stand with elbow at 90 degrees and close to body. If using a theraband, wrap the band around a rail or doorknob and stand side on so that the band is on the side closest to your exercising arm. Start in a position where your hand is away from your midline, then keeping your elbow close to your body, bring your hand in towards your belly button. Pause then slowly return to the start position.
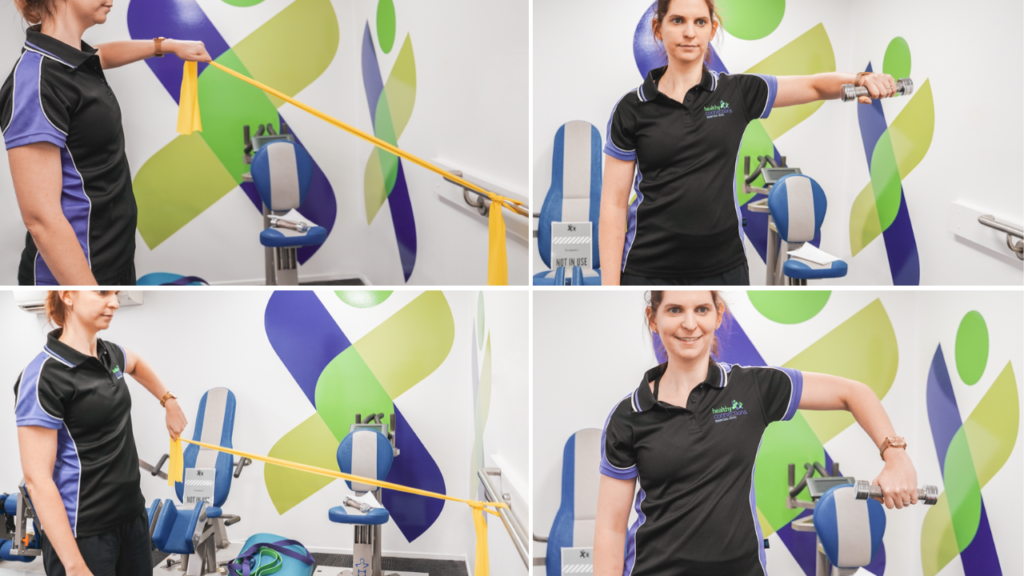
b. Advanced: theraband or weight at 90 degrees abduction
A similar exercise to the above. If using a theraband, wrap the band around a rail and doorknob and stand face on to the band. Position your arm in 90 degrees abduction (i.e. elbow bent at 90 degrees and lifted to be in line with shoulder). Starting with your lower arm parallel with the floor, pull band or weight down. Pause then slowly return to the start position.
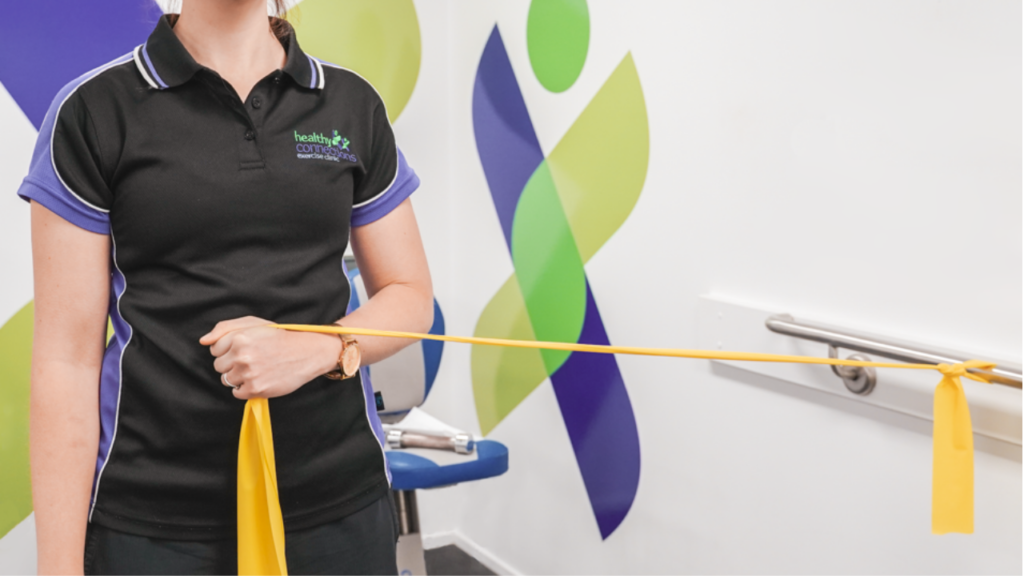
2. External rotation
a. Beginner: theraband or weight at 0 degrees abduction
Stand with elbow at 90 degrees and close to body. If using a theraband, wrap the band around a rail or doorknob and stand side on so that the band is on the side farthest to your exercising arm. Start in a position where your hand is near your belly button, then keeping your elbow close to your body, bring your hand outwards away from your belly button. Pause then slowly return to the start position.
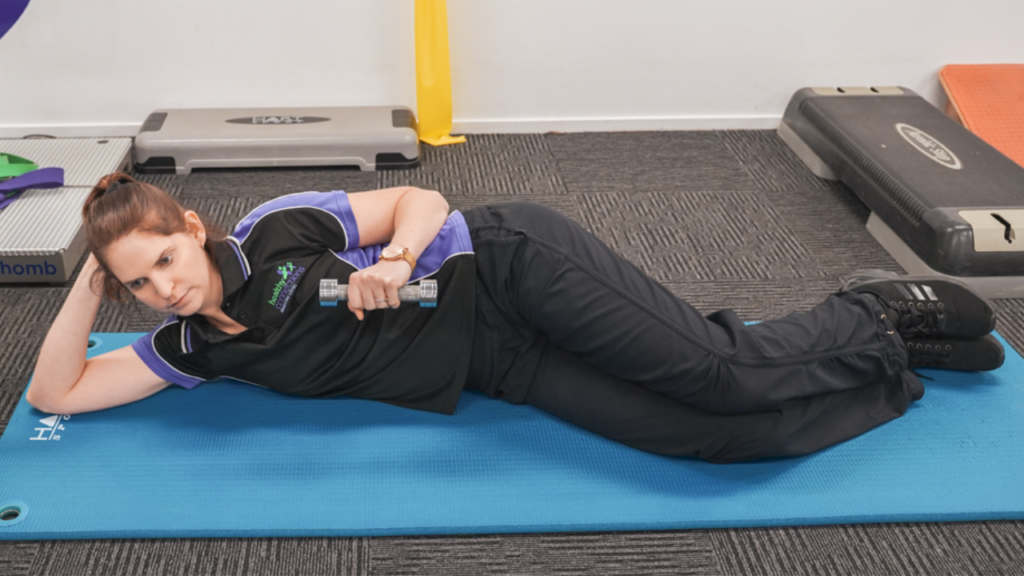
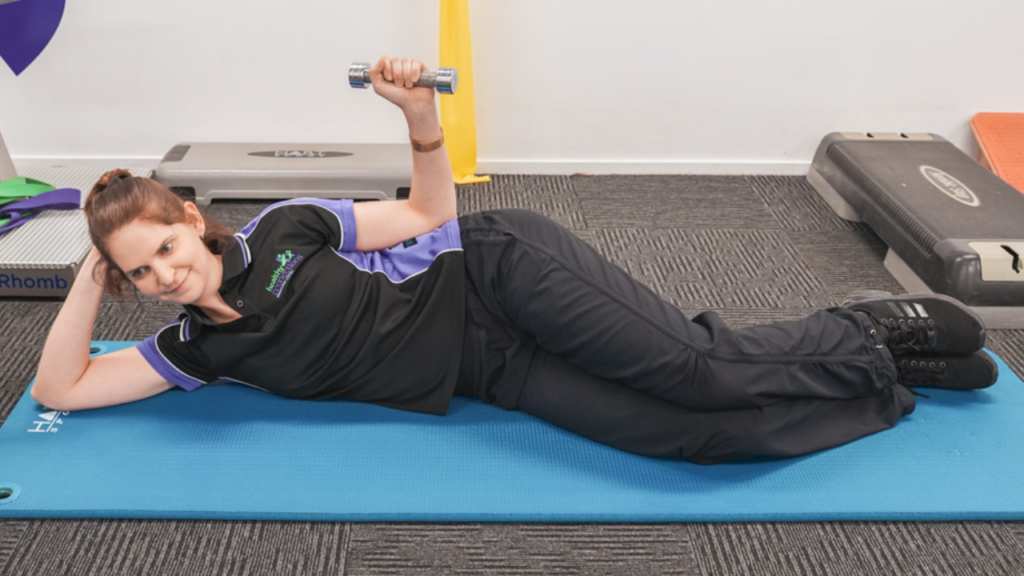
b. Intermediate: side-lying with weight
Lie on your side with weight in top arm. With elbow bent at 90 degrees and stuck to your side, lift your weight up away from your body. Pause then slowly return to the start position.
c. Advanced: theraband or weight at 90 degrees abduction
If using a theraband, wrap the band around a rail and doorknob and stand face on to the band. Position your arm in 90 degrees abduction (i.e. elbow bent at 90 degrees and lifted to be in line with shoulder). Starting with your lower arm parallel with the floor, pull band or weight up to a stop sign position. Pause then slowly return to the start position.
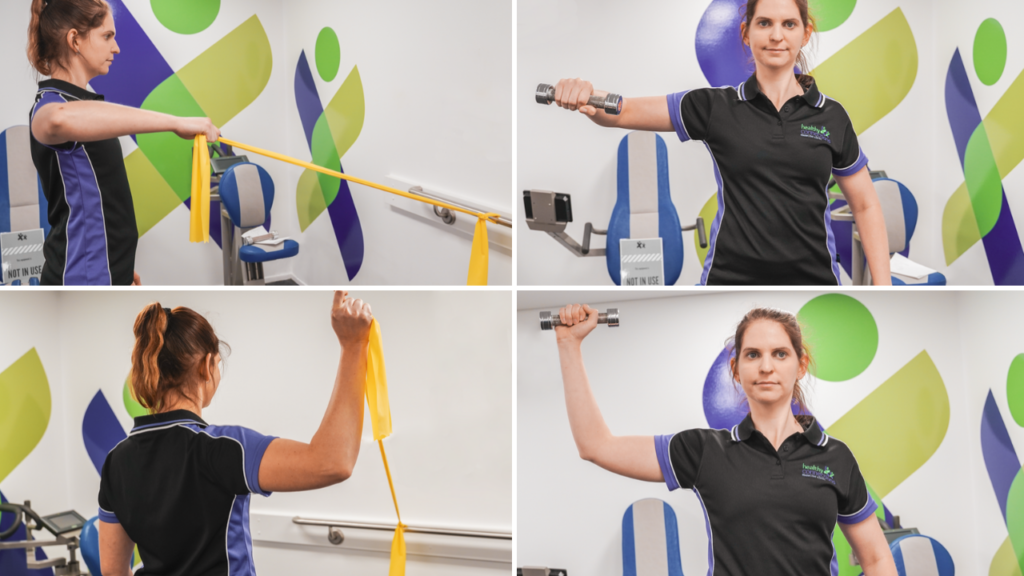
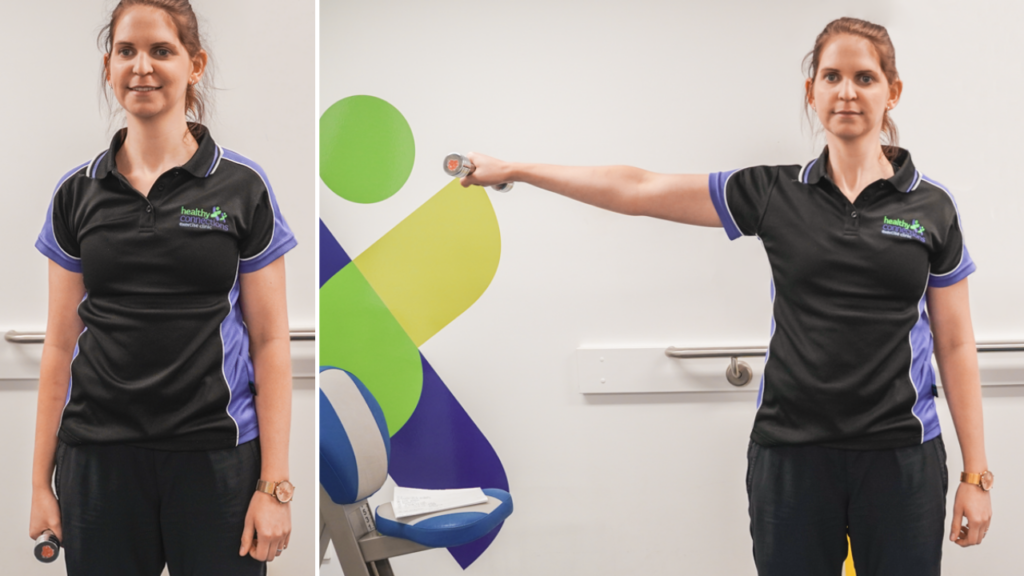
3. Shoulder abduction (to pain-limited ROM)
Sit or stand with good posture, weights in one or both hands. Lift your arms out to the side, lifting no higher than shoulder height (or within pain limits). Slowly lower to start position. You can perform this exercise with one arm at a time or together. Start with a light (or no) weight then progress gradually.
4. Push-ups
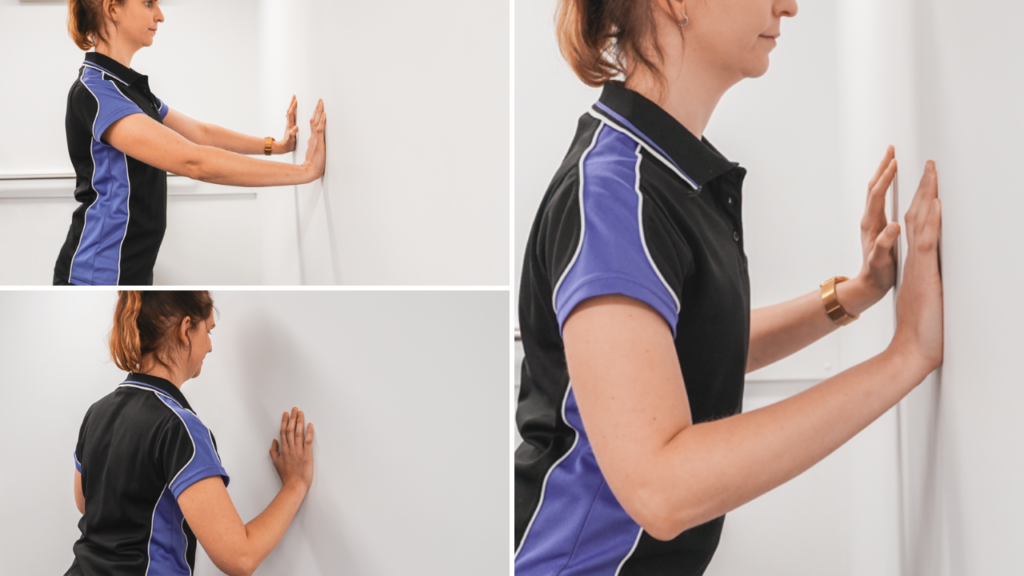
a. Beginner: wall push-up
Start facing a wall with hands just below shoulder height and arms straight. Keeping your elbows close to your body, bend your elbows so that you move closer to the wall, then push out to start position. Your body should move as a plank, still from your shoulders to your feet. Remember to keep your chin tucked in and shoulders down.
Note: the farther your feet are away from the wall, the harder this exercise will be.
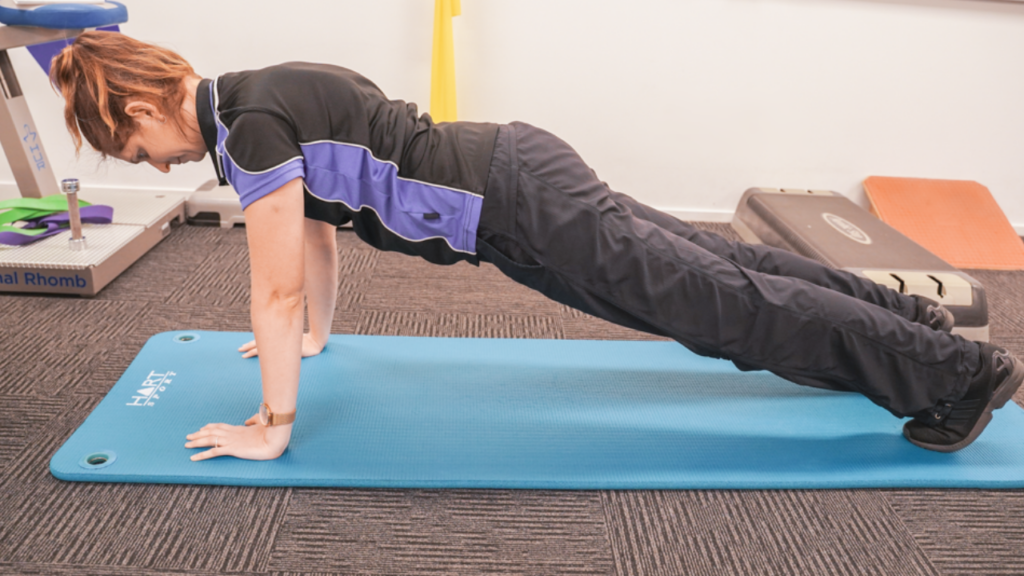
b. Intermediate: isometric plank in push-up position
On the floor or bed, assume an all-fours position with your hands directly below your shoulders. Extend your legs and lift hips up so that you are in a position to do a push-up. We are going to hold this position to activate all shoulder stabilising muscles. Remember to keep core on, glutes squeezed, and shoulders down and back.
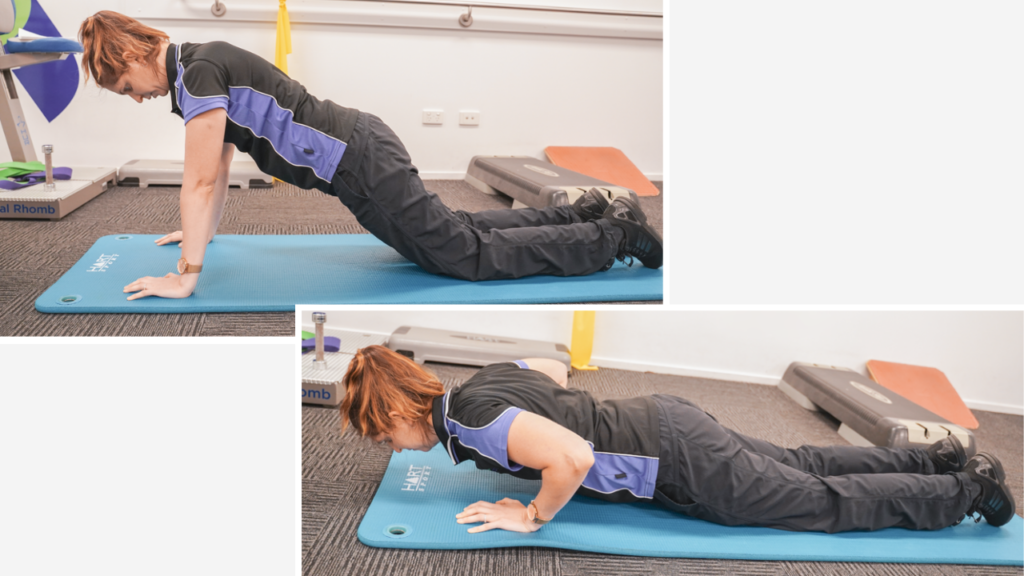
c. Advanced: push-up (on knees or feet)
Assume a push-position on the floor or bed (either from your knees or feet). Lower your body slowly to the ground then push-up to start position. Your body should move as a plank, still from your shoulders to your feet. Remember to keep your chin tucked in and shoulders down.
5. Row
a. Beginner: theraband row
Wrap the band around a rail or doorknob and hold one end in each hand. The band should be taut and your arms straight. With good posture, pull the band towards your ribs, squeezing your shoulder blades together. The challenge is to keep your shoulders down at the same time!
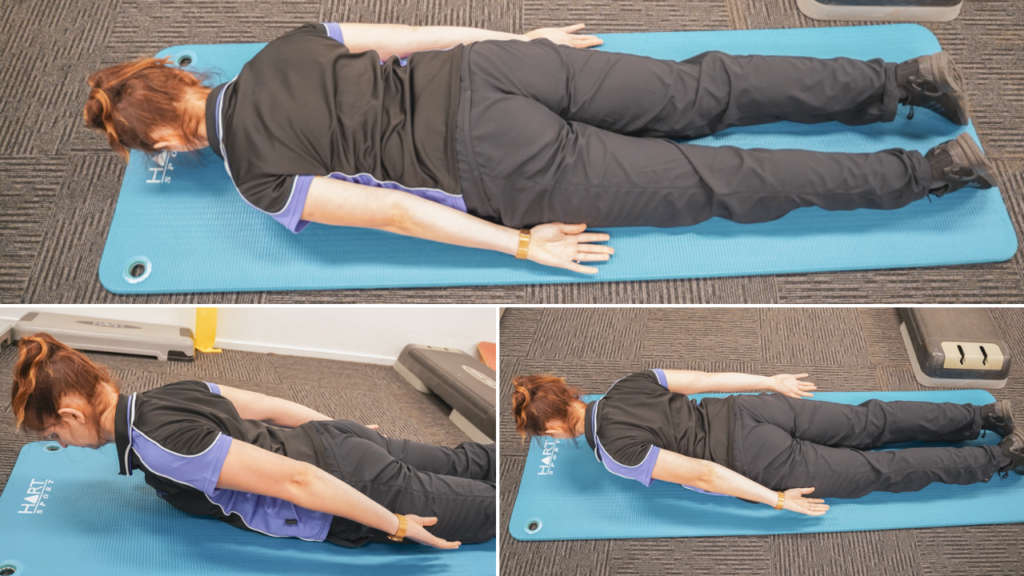
b. Intermediate: seal (arms at 0 degrees abduction)
Lie face down on the floor or bed, with arms by your sides. Using the muscles between your shoulder blades, squeeze your shoulders blades together to lift your chest up off the ground (you can lift your hands slightly off the floor too). Slowly lower.
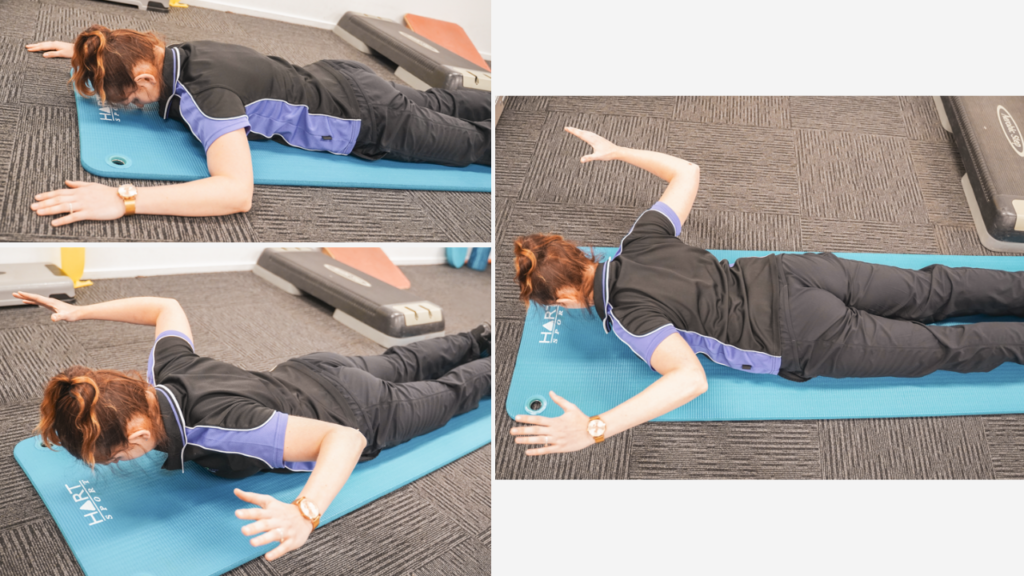
c. Advanced: seal (arms at 90 degrees abduction)
Lie face down on the floor or bed, with arms in a stop-sign position. Using the muscles between your shoulder blades, squeeze your shoulders blades together to lift your chest and elbows up off the ground. Slowly lower.
I hope you find these exercises helpful in enhancing shoulder movement and stability.
Public announcement: COVID-19 Procedures Update
As you would be aware, our clinic is up and running with a few changes in line with government regulations. As of this week, our clinic has updated these protocols as per Stage 3 of Queensland’s easing of restrictions. Please find below these important updates:
- No longer a limit of 15 people per session
- Members no longer have to book in for Members sessions
- Members are now required to bring their Burnie Brae member card and swipe it upon arrival
- Due to no longer needing to book, members are now asked to locate their own program card from the white filing cabinet – you card should remain in a plastic sleeve and be placed in the basket near the cabinet at the end of your session
Other protocols still in place include:
- Pre-screening – temperature check and questions
- Cleaning procedure – please bring a towel and wipe down equipment after use using the cleaning spray and cloths
- Please continue to arrive on the hour for your session to allow for pre-screening
- Please continue to bring a towel and water bottle (water fountain still not in use)
As always, stay safe, wash your hands and keep moving!
Sophie